Monte Cristo Sandwich

The sandwich that is the oddest in my book is the Monte Cristo sandwich. It is a class of sandwich, with several regional variations. Generally speaking, the pieces of bread are sweet French toast and the sandwich filling is savory.

The sandwich filling may be ham and cheese or turkey ham and cheese, much as in a club sandwich. Some parts of the United States grill a “closed” sandwich, whereas other places serve it open-faced with Swiss (or other) cheese melted on top. The bread is always French toast. Some recipes call for a more savory approach (Thousand Island dressing on plain egg toast, with fries on the side), and others lean toward the standard American breakfast French toast with powdered sugar, maple syrup, and fresh fruit salad as garnish.

The thing is, French toast isn’t actually that unusual as a sandwich exterior. Several recipes call for two pieces of bread dipped in egg and fried. I think it’s the combination of ingredients and the name that make this sandwich stand out.

The name of the sandwich is, obviously, a nod to Le Comte De Monte-Cristo, the Alexandre Dumas adventure novel, published in 1844. The Count of Monte Cristo’s protagonist, Edmond Dantes, who had been wrongfully accused and imprisoned and subsequently escaped from jail, flees to the island of Monte Cristo and finds the legendary treasure of the Spada family. With the riches, he can fund his revenge on those who wronged him. His revenge is formidable and the results shocking. The book is a classic.

Alexandre Dumas, painted by Olivier Pichat

Alexandre Dumas, painted by Olivier Pichat

The history of the sandwich is more difficult to unearth than the Spada family treasure. Many references assume that the first incarnation of the Count of Monte Cristo sandwich was in Disneyland, in Anaheim, California (where it was served at the Blue Bayou in New Orleans Square and in the Adventureland Tahitian Terrace restaurants). The earliest Disneyland menu it is found on is from 1966.

The first cookbook to publish a recipe was the Brown Derby Cookbook.[1] Its recipe:

     Take three slices of white bread. Butter the first and cover with lean baked ham and chicken. Butter the middle slice on both sides, place on meat, and cover with thinly sliced Swiss cheese. Butter the third slice and place, butter down, over cheese. Trim crusts; cut sandwich in two; secure with toothpicks; dip in light egg batter; fry in butter on all sides until golden brown. Remove toothpicks and serve with currant jelly, strawberry jam, or cranberry sauce.

The Brown Derby did not claim to have invented the sandwich. In Southern California, it was served in many cafés, from some at swanky golf courses to the famous Cantor’s Deli in Hollywood[2].

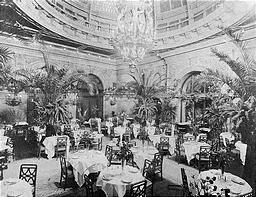
However, all these citations are predated by the Monte Cristo Hotel in Everett, Washington. The sandwich was a house special in its cafe.

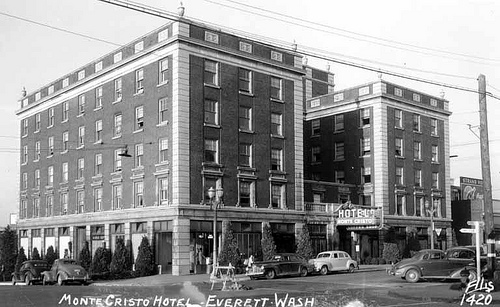
Monte Cristo Hotel, Everett Washington


The first written citation on the sandwich was in a weekly Los Angeles Times column by Chef A. L. Wyman[3] in 1924. His recipe:

     Cover six slices of sandwich bread with a slice of American full cream cheese, cover the cheese with slices of boiled ham, cover with slices of bread, tie with white string, dip in beaten egg and fry a nice brown on both sides in hot butter. Place on hot plates, remove the string and serve.

It is notable that his recipe called for cream cheese, not the Swiss cheese or Emmentaler (a type of Swiss cheese) that is fairly standard among all the recipes.

The Monte Cristo has many minor variations. The most common: The bread is made into French toast first and then grilled (using 3 pieces of bread in a “Dagwood” layering[4]); a sandwich (usually with 2 pieces of bread) assembled and dipped in an egg/flour thickened batter; meat variations such as ham, turkey, and chicken; a sandwich served with jam, jelly, fruit, or maple syrup and dusted with confectioner’s sugar (and sometimes whipped cream); and a savory version (Cumberland-head style) served with Thousand Island dressing and garnished with pickles, relish, or French fries.

Monte Cristo Sandwich

1 egg

6 tablespoons milk

2 tablespoons flour

3 slices bread

2 teaspoons butter

3 tablespoons grated Parmesan or other hard cheese

¼ teaspoon ground nutmeg

1 (2 ounce) slice Swiss cheese

2 (1 ounce) slices roasted turkey

2 (1 ounce) slices boiled ham

confectioners’ sugar, for garnish

jam, for garnish

Whisk egg, milk, and flour together to make thick batter. Heat skillet on medium heat to melt small amount of butter. Dip bread into batter until coated, and put into frying pan; sprinkle with grated cheese and nutmeg. Cook until golden brown on both sides. Put Swiss cheese between 2 pieces of battered bread. Grill until cheese has melted enough to join the 2 pieces together. Remove from pan. On plate assemble sandwich. Place ham and turkey on top of grilled cheese pieces, and put last piece of battered bread on top. Dust with confectioners’ sugar, and serve with side dish of jam.
[1] Doubleday & Company: Garden City, NY, 1949 (p. 183). The Brown Derby was a chain of restaurants in Los Angeles, California. The first and most famous was opened in a building shaped like a hat. The restaurants were iconic during the Golden Age of Hollywood. The first restaurant opened in 1926.

[2] The original Cantor’s—a Jersey City, New Jersey, delicatessen—opened in 1924 and moved to Hollywood in the 1940s.

[3] The regular column was called Practical Recipes: Helps for Epicures and All Who Appreciate Good Cooking. The Monte Cristo sandwich recipe was published May 24, 1924.

[4] Dagwood Bumstead was a character in artist Chic Young’s long-running comic strip Blondie. Dagwood was famous for creating insanely tall, multilayered sandwiches topped with an olive on a toothpick. This name has become a food term to describe any sandwich with more than two pieces of bread.

The Quest for the “Perfect” Scrambled Egg

Old Woman Selling Eggs  Hendrick Bloemaert (1602-1672) Rijksmuseum Amsterdam

Old Woman Selling Eggs Hendrick Bloemaert (1602-1672)
Rijksmuseum Amsterdam

People fixate on how to make the “perfect” scrambled egg. I don’t think there is any egg dish that has so many experts, so many techniques, and such a variety of opinions. It ranks up there with discussing politics or religion.

The basic scrambled egg is a fried egg that mixes the egg yolk and white in a process known as beating (or whipping, depending on the recipe) and then cooking the egg by frying while disturbing the egg by stirring. The result is that the protein in the egg will coagulate into soft, moist curds. In an egg scramble, something is added to this basic scrambled egg to create new and different taste combinations.

Some people whisk the eggs before cooking. Others crack them directly into the pan and mix the yolk and white in the pan through gentle stirring. Some add stock, cream, butter, milk, cottage cheese, cream cheese, melted butter, sugar, cream of tartar, vinegar, lemon juice, oil, or water when they whisk the eggs. Others insist that scrambled eggs should remain unadulterated.

If you add liquid, the rule of thumb is no more than 2 teaspoons of liquid per egg.

There are recipes that want you to separate the yolk from the white, whip the white until stiff peaks form, and then fold it into the yolk. These recipes create egg dishes that are something other than scrambled eggs—more akin to soufflés.

When a recipe calls for you to stir the eggs, do so gently. (Do not stir the eggs as if you were mixing chocolate powder and milk. Violent movement will prevent the curds from forming.)


Beating Eggs to Scramble:
Again, it’s all a matter of taste. As stated above, some people do not really scramble the eggs in a bowl before cooking. They crack them into the pan and stir them around to break the yolks. Other people freak out and insist that the only way to “properly” scramble eggs is to crack them into a bowl and beat them with a fork, a whisk, or an electric mixer until a great deal of air is trapped in the egg proteins. Other people will tell you to not beat eggs for more than four beats. Meanwhile, the American Egg Board describes a well-beaten egg as “frothy and even-colored.” Some recipes actually recommend whisking the eggs for as long as two minutes.

What directions do you follow? It depends on the type of scrambled eggs you like.

  • If you like your scrambled eggs to have bits of yellow and bits of white in a mosaic of egg, beat your eggs in the pan and wait for several seconds before you begin to mix the two.
  • If you want light, fluffy, even-colored eggs, lightly whisk the eggs and add a small amount of acid (cream of tartar, vinegar, or lemon) and push the eggs gently to the center of the pan.
  • If you really like flat, tough scrambled eggs, then beat them excessively. The pounding causes the proteins to uncurl, stretch out, and then form new connections. When egg yolks and whites are beaten together, the proteins of each react to each other. If you overwhip the eggs, you will destabilize the proteins. When the proteins are destabilized, their ability to trap air and form new connections will be pushed to the limit. The egg proteins will have nothing left to connect together during the heating process.

Do not confuse beating the egg yolk together with the egg white with beating egg whites alone. When making a meringue, soufflé, egg puff, or other recipe that relies on a great amount of air trapped in the long strands of the egg white protein, you will whip it for a very long time, often with an electric mixer, until the egg whites form stiff white peaks. This is a completely different egg preparation method than blending egg white with yolk until a creamy, even color.

If you do use an electric mixer, do not beat for more than a few seconds. After beating, set the eggs aside to relax for a few minutes before assaulting them with heat.


Push, Don’t Stir: Many scrambled egg recipes want you to stir the eggs to break up the solid omelet-like egg patty to make the more graceful, scrambled egg soft curds. The most effective way to “stir” is not to stir at all. The more accurate description is to push the eggs from the outer edges toward the center, occasionally, once they have begun to set in the pan. Since there is really no cooking instructional term that expresses “push around in the pan,” stir is what’s used, but it is an ill-fitting instruction.

Do not be too ambitious during this part of the cooking process. Give the eggs time to start to coagulate, and then push them toward the center so that the uncooked runny egg can flow onto the pan and the cooked mounds can be clumped together in the center.

The term for how an egg becomes firm is set in some cookbooks and curd in others, and others still use terms such as firm up, solidify, or even fluff. The point is that the eggs will change in texture and cease to be liquid.

Salt and Eggs: Salt is another point of contention. The old cookbooks’ motherly advice is that salt added to a raw egg will result in a tough cooked egg. (Spices, if desired, should be added after the eggs have started to curdle which keeps the spices suspended and cooked in the egg, instead of falling to the bottom of the pan.) Throughout this book, I have omitted salt from the recipes. Aside from the toughness issue, the amount of salt in new, compared to old, recipes is startling. Whereas a recipe in the 1900s would use a pinch, recipes today have ¼ teaspoon or more. My feeling is that you can salt an egg dish to taste after it is served.

Timing:  How long to cook scrambled eggs is also a controversial subject. Some people like their eggs cooked for a long time until very firm and rubbery. Some like them browned, and others like them still rather moist, with a glaze of not quite fully cooked egg. (The heat of the eggs will continue cooking until they are served and consumed.)

The Pan: Nonstick pans are often recommended for egg cooking. (Personally, I’m not fond of the concept of a heated plastic surface in contact with foods I am going to eat. Overheated nonstick cookware can release off toxic fumes strong enough to kill a canary or other pet bird. No thank you.) I prefer a cast iron pan that is well seasoned or a stainless steel one. Some people do not like cooking eggs in cast iron, because it can color the eggs ever so slightly. However, the heat-holding qualities of cast iron make it the easiest type of pan to cook eggs in, from my experience.

Start by heating a dry pan until water droplets dance on its surface. Then add butter or oil and get it to a high heat, but below the smoke point. (If the oil turns dark, remove the pan from the heat immediately). Be careful not to let any water get into the pan once the oil is in it, or you may be splattered with hot oil. When you have added the eggs to the pan, turn the heat down to low. Use a wooden or metal spatula, and push the eggs from the outer edges to the center.

Basic rule: lower heat + constant gentle movement = creamier eggs.


The History of Eggs Benedict

This is a rich breakfast dish, which brings to mind the relaxed dining in an expensive hotel restaurant (or ordered through room service).  It consists of two halves of a toasted English muffin, a slice of ham, a poached egg, smothered in Hollandaise sauce.  (Sadly, the closest many people have come to Eggs Benedict, is a MacDonald’s Egg McMuffin, which swaps out the Hollandaise for melted American Cheese.)

The dish is worth every bit the effort to make it. Too bad it’s history is so muddled with alternating stories all around the end of the 1800’s.

On December 19, 1942, in the column called “Talk of the Town” in The New Yorker Magazine one of the origin stories of eggs Benedict is offered.

5thAve_WaldorfAstoria_Interior_PalmGarden_1902

Waldorf Astoria Hotel, Interior Palm Garden 1902

The story, as published:

“Forty-eight years ago Lemuel Benedict came into the dining room of the old Waldorf for a late breakfast. He had a hangover & ordered buttered toast, crisp bacon, 2 poached eggs, & a hooker of hollandaise sauce, & then & there put together the dish that has, ever since, borne his name, Eggs Benedict.”  “ Oscar Tschirky, the famed maître d’hôtel, was so impressed with the dish that he put it on the breakfast and luncheon menus but substituted ham for the bacon and a toasted English muffin for the toast.”   

The year that Lemuel Benedict cited would have been around 1894.

In 1896 – Fannie Merritt Farmer’s (1857-1915) revised, edited, and reissued Mary J. Lincoln’s cookbook called The Boston Cooking-School Cook Book. In it is a recipe for Eggs à la Benedict. The recipe is as follows:

Eggs à la Benedict – Split and toast English muffins. Sauté circular pieces of cold boiled ham, place these over the halves of muffins, arrange on each a dropped egg, and pour around Hollandaise Sauce II , diluted with cream to make of such consistency to pour easily.”

In September, 1967, in an column in The New York Times Magazine, Craig Clairborne wrote about a letter he had received from an Edward P. Montgomery, regarding a recipe given to him by his mother, who had received it from her brother, a friend of the Commodore E.C. Benedict, a banker and yachtsman, who died in 1920, at the ripe age of 86 years old. Presuming that the Commodore was in his 30’s when the dish was created in his name, the year would have been around 1894.

Two months later, (November 1967)  in a letter to the editor published in the New York Times Magazine, Mable C. Butler of Vineyard Haven, Massachusetts corrected Mr. Clairborne’s accounting of the origins of Eggs Benedict.   She claimed to be a relative of Mrs. Le Grand Benedict.  Mr. and Mrs. Benedict dined every Saturday at Delmonico’s.  She asked the maitre d’hotel if there were anything new to suggest. He asked her what sounded to her.  She suggested poached eggs on toasted English muffins, with a thin slice of ham, hollandaise sauce and a truffle on top.

To back this version up, Delmonico’s Chef Ranhofer published a recipe called Eggs a’ la Benedick (Eufa a’ la Benedick) in his The Epicurean cookbook called The Epicurean published in 1894.  His Eggs à la Benedick recipe:

“A round of cooked ham an eighth of an inch thick and of the same diameter as the muffins one each half. Heat in a moderate oven and put a poached egg on each toast. Cover the whole with Hollandaise sauce.”

The problem is, as with all food history, and all invention history, for that matter, great ideas are often considered by different people, at the same time.  It is possible that multiple people came up with the same idea at the same. It is possible that some version of this recipe was published in one of the many magazines or newspapers of the day.  Or, it is possible that some of these people were related, ran in the same circles (as they dined in expensive restaurants) and one, or several heard of the dish, and was curious to try it.  . It is also possible that Mr. and Mrs. Benedict had heard of the dish suggested by Lemuel Benedict (or visa versa).  Perhaps they were related?  Perhaps the combination was obvious given the food trends of the era was an obvious one.  Sometimes food combinations invent themselves.  After all, who really invented peanut butter and jelly sandwiches?  Obvious pairings are meant to be together.

Eggs Benedict for Two

4 fresh English muffins

8 pieces of thin sliced lean ham cut into rounds the size of the muffins

8 eggs

¾ of a cup of Hollandaise sauce

Lightly toast the muffins then spread them with butter. Grill the ham and place one piece on each muffin.  Poach the egg by bringing 4 cups of water to a boil, then reducing the heat to simmer.  Crack an egg into a soup ladle and gently lower the eggs, individually into the hot water.  Roll the eggs over to keep the whites close to the eggs. Cook to desired doneness (although, ideally, the egg yolk should still be somewhat runny).    Place the Canadian Bacon on the muffing, add the poached egg on top, and smother the whole thing with several tablespoons of Hollandaise sauce.  Serve

Hollandaise Sauce

769px-Jehan_Georges_Vibert_-_The_Marvelous_Sauce,_ca._1890,_Albright-Knox_Art_Gallery

Jehan Georges Vibert “The Marvelous Sauce” 1890 (oil on wood) in the collection of the Albright Knox Art Gallery

There are many variations on how to make a good egg sauce.  Cook books and website will promote various techniques, some of which are benign, some which are completely wrong.  You do not want to even try to make the “easy” blender or food processor aided techniques to emulsify a sauce. The “simple blender Hollandaise” recipes (more often than not) result in a lumpy, odd textured sauce. The idea of making a Bernaise sauce by making a basic mayonnaise (same concept, both are an emulsification of egg yolk and oil), then heating it often results in a strange texture.  I’m not saying it cannot be done, but I am saying that I have yet to find anyone who has succeeded with these techniques.

Just like making mayonnaise, though, there are many recommendations.   Some cooking experts will tell you to start with nearly frozen butter, cut into small cubes, and let the butter melt as you blend it with the yolk over heat.  (It works. It can take a long time for the butter to melt, but the end result is fine.)  Some recipes make no distinction on the temperature of the butter, but instruct one to use the pan directly on low heat, and move it off the heat when needed to control the temperature.  Other recipes recommend an extra step, to start, by clarifying the butter first (which I prefer) and then mixing the oil into the yolk similar to how to make mayonnaise, only over a double boiler (bane marie).

Actually, these emulsified sauces are nearly identical to mayonnaise in technique and in texture. The only difference is the added heat during the making of the sauce, and the resulting warm sauce.   The reason to not make the sauce cold and then heat it, is that the emulsified cold sauce (except under the most gentle of heat) will break frightfully easy.

My husband insists that clarified butter is an unneeded step. That any butter will work, salted or not, although the only butter he usually has on hand is unsalted butter.  He has made Hollandaise and Bernaise sauces hundreds of times. I, on the other hand, have only made the sauce with a clarified butter, but have made mayonnaise many times, and I like a liquid oil to mix into the egg yolk, because I find it easier to control, and more familiar.   Since we both come up with the same basic end result, I suppose it’s only a matter of which directions you care to follow, and practice with. One thing is for certain, this is a sauce that you have to be prepared to practice, and make routinely, until you get the techniques foolproof, or nearly so. The key is to not get frustrated. Once you have the hang of it, its an easy, and elegant sauce to “whip up”.

I always use a bain marie (double boiler) to make a Hollandaise or Bernaise sauce.  The gentle heat slows the cooking time, and provides more even, gentle heat.  (A double boiler is also necessary if you need to “hold” the sauce to wait for the rest of the meal to finish cooking.) It also allows more time to fix a “break”.  And, it also reminds me to “go slow” and to not rush.

If the egg in the sauce begins to curdle, you can strain the sauce through several layers of cheese cloth, return the liquid to the pan, and add a new egg yolk, and try again.  Addition of some very, very cold water (a teaspoon to a tablespoon) can cool the sauce temperature down enough to stop the break.  (Then, whisk energetically to get the egg proteins to smooth out, and accept more oil.)   If a sauce breaks, it breaks.  Everyone has it happen, sometimes.  When it does, just start over, and go slower and you’ll find success.

How to Make Clarified Butter

Clarified butter, also known as drawn butter, (similar to ghee, which is heated at low temperatures longer) is butter that you have removed all residual whey, and milk solids from.  Butter, in the stick, from the carton, has a pale yellow color because milk solids (aka whey and leftover bits of milk solids) are still mixed in.  These remaining bits scorch at a lower temperature (250-300 degree smoke point) than the butter fat alone (325 to 450 degree smoke point).

To remove the whey and milk solids, melt the butter on very low heat until the butter simmers. As the butter simmers three layers will develop. The foamy scum on the surface (the whey) and a darker layer on the bottom of the pan (milk solids).  Carefully remove the foam with a spoon (and reserve for other uses. It’s fantastic on vegetables, or popcorn).  Then strain the butterfat through several layers of cheesecloth to remove the milk solids that have collected, and hardened at the bottom.   The clarified butter, in the center, will be an amber color.     This extra step will make a huge difference in sauce creation.   (Never use salted butter as the salt can cause the yolks to curdle.  Once salt is in butter, it cannot be removed.)

1lb of butter will yield, roughly, 1½ cups of clarified butter.

HOLLANDAISE SAUCE RECIPE

This is a sauce that has a lemony flavor. It is butter and eggs emulsified over heat. The sauce is rich and smooth, but not oily. It is served hot over vegetables (asparagus, broccoli) red meats, fish, game, and eggs (like Eggs Benedict).

Hollandaise Sauce

½ cup clarified butter

3 raw egg yolks

4 tablespoons boiling water

1½ teaspoons heated lemon juice

Few grains cayenne

(2 tablespoons ice water, if needed)

Start with ¾ cup butter, and heat slowly on low heat.  Let the butter separate into whey, butter fat and milk solids.   Skim off whey, strain to remove milk solids.  Measure ½ cup butter, and set aside

In a separate pan heat 2 teaspoons fresh lemon juice and heat until boiling.  Remove from heat and strain to remove seeds and pulp.  Set aside.  Heat ½ cup of water.  Set aside

In a bowl separate egg yolks from whites.  Whisk yolks for several seconds to blend well. Put egg yolks into double boiler, over boiling water.   Whisk until they begin to thicken. Add ¼ teaspoon of water, and mix in well.  Add ¼ teaspoon more, until all is mixed in to the yolk.

Turn off heat, but let yolks remain in double boiler over simmering hot water.  Whisk the egg yolks constantly.  Add several drops of the warmed lemon juice. Whisk in well.  Then, add warm melted butter in a thin stream, in small amounts, and continue to whisk until the egg absorbs the butter, then add more.  The more completely the yolk can absorb the liquid the better.

Slow down if the emulsification starts to “break” (curdle), and add a small amount of ice water to cool the sauce, if it does start to break.

Keep adding a drop or two of lemon juice, and then small amounts of butter until it is all incorporated into the yolks.  The mixture should be creamy and smooth. Once all the butter, yolks, and lemon juice are one smooth, thick emulsification add cayenne.

The Real American: an Egg and a Grog in a Noggin

2 old men eating soupThe settlers of colonial America embraced eggnog and adapted various recipes from Europe and England to combine eggs and milk or cream with rum (grog) instead of wine or ale.

The term eggnog is subject to some discussion. It may have been derived from “egg and grog,” as some suggest. Or it may have been named after the wooden carved mug commonly used in taverns in Europe and in the United States called a noggin. This would imply that the origin may have been a drunken slurring together of “an egg and grog in a noggin.” More likely, the earliest eggnog was made with very strong English ale called nog. And eggnog was just that: egg in nog.

After 1650 the colonists had inexpensive Caribbean rum, and by 1657 a Boston distillery was set up that imported molasses and cane sugar and made rum. Within a year, it was highly successful and became a prosperous New England business. The colonists already had readily available farmland, grazing milk-able cows, chickens, and cheap local alcohol (very inexpensive compared to the heavily taxed European Cognac and brandies). And those colonists were boozers. They believed that alcohol could cure the sick, make the weak strong, pep up the aged, warm you up, aid digestion, increase strength, revitalize libido, and provide motivation. They were certain that it was safer than water. (This may have been true, given the number of water-borne illnesses and lack of adequate sanitation. Cholera was common in the springtime.) By 1770 there were more than 140 rum distilleries making 4.8 million gallons per year, and 3.78 million more gallons of rum were imported each year.

George Washington (of the one dollar bill) was a distiller. After his presidency, he built a whiskey distillery in Mount Vernon. In 1797 his distillery made 600 gallons, in 1798 it produced 4,500 gallons, and by 1799 it was up to 11,000 gallons. When he died, in 1799, he was one of the largest distillers of whiskey in the United States. (It shouldn’t be a surprise that George Washington devised a potent recipe for eggnog that included ridiculous amounts of rye whiskey, rum, and sherry, in keeping with the excessive drinking customs of the time.)

In 1790 the United States government calculated that the annual per-capita ingestion of alcohol for each man, woman, and child over 15 years old was 34 gallons of beer and cider, 5 gallons of distilled spirits, and 1 gallon of wine—nearly five times the current consumption. Back then alcohol (rum and whiskey) was legal tender that could be used like money. People were paid salaries in booze and paid their taxes and bought items by trading and bartering with it.

 Eggnog was popular as a winter drink of the upper class. Since chickens didn’t lay eggs in the dead of winter, the eggs were most likely preserved through one of the many techniques of the time. Stored eggs were a commodity in winter (in spring, when the chickens were laying again, the prices dropped considerably). A Christmas or New Year’s holiday celebration wouldn’t have been complete without an eggnog toddy for toasting health and happiness, and of course, wealth. In the American South, the preferred eggnog alcohols were bourbon or rye. In the North, rum was the more common additive. Nearly any alcohol works well, which accounts for the abundance of recipes.


Napoleon and the Omelette

Jacques-Louis David (1748-1825)  Napoleon Crossing the Alps   Kunsthistorisches Museum

Jacques-Louis David (1748-1825) Napoleon Crossing the Alps — Kunsthistorisches Museum

For the town of Bessières (Haute-Garonne), the omelet has a special significance.

Napoleon Bonaparte (and his army) traveled through the area. He stopped at a local inn and enjoyed an omelet so much that he demanded that the local villagers collect enough eggs so that his entire army could enjoy an omelet the next morning. What the town created was one giant omelet.

Since then, on Easter Monday, a several-thousand-egg omelet is made there. It is cooked in a giant pan over a giant fire. The omelet is several yards wide and serves a thousand or more people. (A bit extreme, perhaps.)

However, this giant omelet stuff has become an annual event not only in this village in France but also elsewhere in the world. The only Giant Omelette Celebration in the United States is in Abbeville, in the Vermilion Parish of Louisiana (outside Lafayette).

The other six “official” giant omelette cities are Bessières and Fréjus, France; Dumbea, New Caledonia; Granby, Quebec, Canada; Malmedy, Belgium; and Pigüé, Argentina.

The Basic Omelet

The basic omelet is a beaten egg cooked in butter in a frying pan. It is folded in half when it is nearly cooked. Various ingredients are added in the fold: cheese, vegetables, meat such as bacon or ham, herbs, or some combination. An omelet can be made with whole eggs, just yolks, or just whites. Usually some other liquid, such as water, milk, cream, or broth, is added. The idea behind the added liquid is that more air bubbles will be trapped in a thinned mixture. Some omelet recipes call for a few drops of lemon juice or a pinch of cream of tartar (tartaric acid), which can strengthen and elongate the protein fibers and create a fluffier final product.

Omelets are usually cooked on one side, without being disturbed, before being folded and cooked the rest of the way through.


Classic French Omelet #1

3 eggs

1 tablespoon milk (or water)

¼ cup shredded cheese

ample amounts of butter

Mix eggs and milk until blended. Melt butter in skillet on medium-high heat. When butter is hot and just beginning to brown, pour in eggs. Tilt pan in different directions to evenly distribute eggs. Cook for several minutes until eggs begin to set on bottom of pan. Gently lift edges with spatula to let some of the runny egg flow under cooked portion. When egg is still moist on top but fully set on bottom, sprinkle cheese over egg. Fold one side of omelet over cheese and the other half of egg. Let cook until cheese is melted and egg is cooked throughout. Serve at once.

Classic French Omelet #2

2 eggs

2 tablespoons water

1 tablespoon butter

Mix eggs and water. Melt butter in skillet on medium-high heat. Pour eggs in, and evenly distribute. Let cook for several minutes until eggs are cooked roughly halfway through, with just a thin layer of wet on top. Lift edges of cooked egg with spatula to let some of the runny top flow under cooked portion. When egg is fully set on bottom but still moist on top, fold one side over onto the other. Let cook for another minute, and serve.

Angel Food Cake (part two)

The Angel Appearing before the Shepherds by Thomas Buchanan Read (1822-1872)  Dayton Art Institute

The Angel Appearing before the Shepherds by Thomas Buchanan Read (1822-1872) Dayton Art Institute

Food historians believe the white sponge cake was a creation of the Northern European immigrants to America. After all, this group made ample amounts of egg noodles (which used only the yolks) leaving many leftover, whites, and the women also made various ring cakes, that were traditionally cooked in a “deep, round, fancy cake pain with a center tube[1] (a pan not called for in other immigrant, or classic cooking recipes)

Antique Turk’s Head (also known as Monk’s Head) pans can be found in two style: either like a very plain swirled bundt pan,  or, a shallower version of what, today, we call a tube pan, that was referred to in the early 1900’s as an Angel Cake Pan.

early 1900's "turk's head" pan

early 1900’s “turk’s head” pan

In the 1950s, a group of women in Minneapolis asked a NordicWare designer to recreate a fancy tube cake pan, like the ones their mother’s had brought from the old country. The result was what NordicWare named the “Bundt”. The name was trademarked by NordicWare. Sales languished, and the bundt pan was nearly discontinued until a winner of one of the Pillsbury Bake-Off contests submitted a chocolate cake, dubbed “Tunnel of Fudge”[2] baked in a bundt pan. Interest in the pan skyrocketed, and bundt pans soon surpassed the tin Jell-O mold pans as the most sold pans in the United States. The trademarked name “bundt” was, later, rejected by the U.S. Trademark Office as too generic a term.

(In Australia a tube pan is called a ring tin.)

Cakes baked in Turk’s heads, and similar pans are, in part, derived from a bread-like cake made in Germany and Hungary called a gugelhumpf or bundkuchen, the Eastern European babka, burgunder rodon, the Dutch tulband, and the Finnish kermakakku, to name a few.

Evan Jones, wrote in his book American Food: The Gastronomic Story[3], his angel cake theory:

“…angel (or angel food) cakes, may have evolved as the result of numerous egg whites left over after the making of noodles, and may or may not be the brainchild of thrifty Pennsylvania cooks who considered it sinful to waste anything..”

Tube pans (a straight-edged, or slightly sloping baking tin) were created in the late 1800s. These pans appealed to housewives and became a staple in American kitchens. The tube pan has an advantage over regular cake pans for all sponge cakes because heat flows around the center of the cake, which allows the cake to rise higher, cook faster, and more reliably. It is also more stable and less likely to fall, or collapse when removed from the oven. These tube pans were sold, specifically, as angel pans in catalogs in the early 1900’s.

Variations in flavor of angle food cakes recipes range from vanilla, to almond, to rose water, and orange.

Angel Food Cake

1 cup cake flour, sifted

1 teaspoon cream of tartar

Pinch of salt

1½ cup egg whites (approximately 12 eggs)

1½ cup sugar

1 teaspoon vanilla extract

½ teaspoon almond extract

Preheat oven to 325 degrees

Line the bottom of a tube pan with parchment paper (do not grease pan)

In a bowl sift together flour, cream of tartar and salt, several times. Set aside.

Wash a copper bowl[4] or regular bowl, in hot soapy water, to make certain there is no residue of great, and dry thoroughly. Beat room temperature egg whites, until foamy, and then start adding sugar. Beat in a tablespoon at a time, until all the sugar is used up and the egg whites are stiff and form peaks (2-3 minutes with an electric beater, considerably longer if hand whipping). At the very last minute, add the extracts.

Sift the flour mixture over the foam, and fold in, a little at a time, very gently (to not flatten the foam) until all the flour is mixed in.   Immediately spoon batter into the tube pan, then tap the pan on the counter several times to dislodge any large air pockets in the batter. Place the tube pan in the oven, and cook for about an hour, or until the cake is golden brown, and the yields gently to pressure, but springs back up when the pressure is released.

Cool the pan, inverted on the feet build into the pan, or over the neck of a bottle so that air can circulate around it. Cool for several hours.


Run the edge of a knife around the edges of the cake to loosen, and remove from the pan. Cut with a serrated knife.

[1] The Settlement Cookbook by Lizzie Black Kander (1910)

[2] Ella Helfrich, the woman who submitted the recipe took second place in 1966.

[3] Dutton Publishing; 1st edition 1975

[4] Copper bowls react with the proteins in egg whites, and create firmer foam.

Angel Food Cake, an American Invention (part 1)

454px-Franceschini,_Marcantonio_-_The_Guardian_Angel_-_Google_Art_Project

The Guardian Angel by Marcantonio Franceschini (1648-1729)

The angel-food cake is a light, pale sponge cake made of flour, egg whites, sugar, cream of tartar, but no fat (and no yolks). It is usually baked in a tube pan. The angel cake is thought to be (by food historians) an American invention from around 1880-1885.

Food historians look at old recipes and cookbooks to develop their theories of changes in basic recipes, to create something new and different. Around 1870, cook books from around the eastern seaboard were including a recipe for a different kind of sponge cake dubbed snow-drift, silver, white sponge, and angel. Few of the recipes call for a tube pan, so it can be assumed that the pans used were simple, flat cake pan (aka – cake tin).

It is in Mrs. Porter’s New Southern Cookery Book[1]. That the first white sponge cake appeared in an American cookbook: What Mrs. Fisher Knows About Old Southern Cooking[2]. In this book the cake was called a “silver cake”.

     Silver Cake — The whites of one dozen eggs beaten very light, one pound of butter, one pound of powdered sugar; rub the butter and sugar together until creamed very light, then add the beaten whites of the eggs, and beat all together until very light; two teaspoonfuls of the best yeast powder sifted with one pound of flour, then add the flour to the eggs, sugar and butter, also add one-half teacupful of sweet milk; mix quickly, and beat till very light; flavor with two teaspoonfuls of the extract of almond or peach, put in when you beat the cake the last time. Put to bake in any shape pan you like, but grease the pan well before you put the cake batter in it. Have the stove moderately hot, so as the cake will bake gradually, and arrange the damper of stove so as send heat to the bottom of the cake first.

In The Original Boston Cooking School Cook Book by Mrs. D.A. Lincoln, there was a,nearly identical, cake which she called an Angel Cake:

     Angel Cake — One cup of flour, measured after one sifting, and then mixed with one teaspoonful of cream of tartar and sifted four times. Beat the whites of eleven eggs, with a wire beater or perforated spoon, until stiff and flaky. Add one cup and one half of fine granulated sugar, and beat again; add one teaspoonful of fine granulated sugar, and beat again; add one teaspoonful of vanilla or almond, then mix in the flour quickly and lightly. Line the bottom and a funnel of a cake pan with paper not greased, pour in the mixture and bake about forty minutes. When done loosen the cake around the edge and turn out at once. Some persons have been more successful with this cake by mixing the sugar with the flour and cream of tartar and adding it all at once to the beaten egg.  

(Fannie Merritt Farmer’s updated version, 1896, of the Boston Cooking School Cook Book, has the same recipe as in earlier versions, but the name was changed from angel cake to angel food cake.)

In the Woman’s Exchange Cook Book[3] (1894) there is a similar white sponge cake that is actually named angel food cake. The pan called for is a Turk’s Head alluding to the shape of a turban, an Ottoman headdress. This is the earliest known cookbook reference that called for a tube pan to bake an Angel food cake in.

     Angel Food Cake — Whites of 11 eggs, 1 teaspoon of flavoring, one and one half cups of granulated sugar, 1 cup of sifted flour, 1 teaspoon of cream of tartar. Put the cream of tartar into the sifted flour and sift it five times. Sift the sugar. Beat the whites of the eggs to a very stiff froth, add the sugar, and mix carefully; then add the flour gradually, stirring allthe while, and last the flavoring. Turn quickly into an ungreased pan and bake in a moderate oven (sa, 260 degrees fahr) for forty-five minutes. Take from the oven, turn the pan upside down on a rest, and let it stand until the cake falls out. It is best to bake this in a Turk’s head. You can then rest it on the tube.

In Our Home Clyopedia[4] published in 1889, there are a number of recipes for multi-egg white sponge cakes. The pan called for is a cake tin, or a brick shaped tin, and, in one, the pan is, first, lined with pastry.

    Delicious Sponge Cake — Twelve eggs, one pound of sugar, twelve ounces of flour, a pinch of salt; flavor. Beat the whites to a very stiff froth, the yolks till the bubbles look fine. Then the yolks are beaten enough to add the sugar and beat until the sugar dissolved; then add the whites, and lastly the flour, and bake immediately in brick shaped tins. This will make two loaves. You will find your cake so much nicer if baked in a paste. Make with flour and water only; roll out on the board same as a pine crust, line your greased tins all over with the paste and pour in the batter. Bake nearly an hour. Do not break off the paste till you want to use it. Your cake will be more moist and keep longer; indeed the cake will be much better a day or two old.

     White Sponge Cake — Sift together one cup of flour, one-half cup of corn starch, one teaspoonful baking powder; add one cup of sugar, one teaspoonful extract of rose, then add the whites of eight eggs whipped to a stiff froth; mix thoroughly and bake in a well-buttered cake tin in a quick oven 30 minutes.

Recipes, especially back then, were spread by one woman handing another woman a handwritten recept (as recipes used to be called), and so-on, like a virus. Newspapers and magazines had contests for “the best” of various categories along with exotic sounding names and creative adaptations. Sometimes there were cash prizes, but often, the reward was they were published, with citations. These recipes were compiled into various cookbooks that were sold or given away (sometimes, also, as prizes for submitting a winning recipe) which further spread the recipes. Food historians trace the published nuggets, and analyze the subtle difference, to come up with theories as to the origin, including the use of pans.

[1] By M.E. Porter, Published 1871

[2] Abbey Fisher, a former slave from Mobile Alabama, was the first Black American to write a cookbook in 1881

[3] No author is identified. This book appears to be a book that is a compilation of recipes published elsewhere.

[4] No author. This is another collection of recipes, household, and medical tips, that appear to have been cobbled together from other publications.

Egg Soup (Eggs in Purgatory and Shakshuka)

I woke up to frost on the ground this morning, while I’m still wishing for Spring. Maybe that is why it felt colder than the deep winter of a few months ago.  This frost, and the cold wind and rain we’ve been having started me thinking about foods that warm you.

Soup!

Two Old Men Eating Soup, 1819–23, by Francisco de Goya, currently in the Museo del Prado, Madrid, Spain

Soup is a very old dish. It is as old as fire and a container to boil water in. The oldest written egg soup recipe I could find was from the early 16th century in England. The recipe is simple: For each person, take strong-flavored broth; one beaten egg; an egg-size chunk of cheese, cut into small bits; minced scallion or green onion; and minced spring greens. Take boiling stock, skim off any foam, beat egg and whisk it into the broth, and add cheese and greens before serving.

There are a great many recipes that add a few eggs to hot soup to be poached or stirred in to create a creamier, more nutritious soup. Other recipes call for an egg to be added to a small amount of broth and beaten before it is added to the rest of the soup (tempering the egg—diluting it with some of the liquid—makes it less likely to curdle when added to a full pot of broth). There are a few recipes for a custard-based soup, although the real problem with eggs in soups is that they “break” easily (and become granular) with heat that is prolonged or too high.

The most numerous egg-in-soup recipes—for egg drop soup—make the most of an egg cooking in hot liquid. They involve stirring an untempered beaten raw egg into hot soup to create ribbons of cooked egg. In other recipes, this would be called curdling, but it is a desirable attribute in this case. Egg drop soups include the famous Chinese egg drop soup as well as the Central American sopa de anjo (garlic soup) and Greek avgolemono (egg-and-lemon chicken soup).

Syllabub and German Biersuppe are not quite dessert and not savory. They’re more like soup than like egg drinks but are still borderline. Biersuppe and syllabub are both very old versions of liquid nutrition, or early instant breakfast. They share a history with eggnog and other alcohol-and-egg drinks. They are interesting in that the recipes have persisted to modern times, although often not as breakfast or quick lunch meals but, rather, as appetizers, palate cleansers, or offbeat desserts.

And, finally, there is a dessert type of egg soup. These sweet soups are often served for either breakfast or dessert. Some are warm; others are cold. Included are buttermilk soups (usually cold) and a dessert that was popular prior to World War II, Œufs à la neige (also known as floating islands, clouds, and snow eggs). My grandmother was especially fond of her floating islands, firm blobs of meringue poached in a custard and then served floating in a ladleful of the custard. (It is a dessert I had long forgotten about until I tried the recipe.)

Any soup can have a poached egg added to it, and many people do this routinely. The egg is usually poached in the soup, but some people poach the egg in simmering water and then slide it into the soup before serving. The situation in which to poach an egg separately is when your soup is opaque. (It is a little disconcerting when you drop a few eggs into the soup and cannot find them to serve. They drop to the bottom of the pot and are very elusive.) It is another reason some recipes say to put a raw egg in a bowl and then ladle soup over it. This is fine for those who like their poached eggs on the very runny side, as the temperature in the soup bowl quickly drops and the egg doesn’t cook very much. The egg adds extra nutrition to the soup and, with clear soups, visual interest. One very popular poached egg soup is “eggs in purgatory,” which sounds quite daring and slightly naughty. It is eggs poached in tomato soup. A similar recipe is Israel’s shakshuka, which is spicier.

Eggs in Purgatory Soup

  • 3 cups diced tomatoes
  • ¼ cup olive oil
  • ½ cup chopped onion
  • 2 tablespoons flour
  • 1 teaspoon cornstarch
  • 1 teaspoon Worcestershire sauce
  • ½ teaspoon honey
  • ½ teaspoon balsamic vinegar
  • salt and pepper, to taste
  • 1 cup cream
  • 1 cup milk
  • 1 egg per serving

In blender or food processor, blend tomatoes until liquid. Set aside. In large cooking pot, heat olive oil to very hot. Add onions, and sauté until lightly browned. Turn heat down, and add flour and cornstarch to make smooth roux. Add pureed tomatoes. Stir until blended, and heat until boiling. Add Worcestershire sauce, honey, balsamic vinegar, and salt and pepper. Reduce heat to simmer, and let soup simmer 20 minutes. Remove from heat, and, while stirring constantly, add cream. Then add milk. Continue to stir, and return pot to stove on low heat. Stir constantly 10 minutes, to let soup heat thoroughly. Remove from heat. Poach one egg for each serving. Crack eggs into measuring cup, and slowly pour into soup. With slotted spoon, move eggs apart and roll them occasionally while cooking (4 to 6 minutes). Ladle soup and poached egg into individual serving bowls.

Shakshuka (Israel)

  • ¼ cup olive oil
    3 jalapeño peppers, seeded and chopped
    1 cup chopped onion
  • 5 cloves garlic, crushed and minced
    1 teaspoon ground cumin
  • 1 tablespoon smoked paprika
  • 3 cups diced tomatoes
  • ½ cup red wine
    6 eggs
    ½ cup crumbled feta cheese for garnish
    chopped cilantro or Italian parsley for garnish
    warm pitas for serving

In deep-sided skillet, heat olive oil until very hot. Sauté chilies and onions together until limp. Add garlic, cumin, and paprika, and cook several more minutes until garlic is soft. Add diced tomatoes and red wine. Cook on medium heat, stirring occasionally, until flavors are blended and soup is boiling. Turn off heat, and slide whole eggs into soup, distributed across surface. Cover skillet 5 minutes to let eggs set. Remove poached eggs with slotted spoon, and put into individual serving dishes. Ladle hot soup over eggs, and garnish with feta and cilantro. Serve with pita bread.

Mayonnaise

hellman's fixed

1. Hellman’s Delivery Truck, circa 1930’s 2. BEST FOODS Real Mayonnaise Jar, 1939 3. Mr. Richard Hellmann, 1920’s 4. HELLMANN’S Real Mayonnaise Jar, 1939 5.) Richard Hellmann’s staff and original delicatessen, 1912 6. BEST FOODS delivery vehicle 1920’s

When most of us think of mayonnaise, we think of Best Foods, or Hellmann’s (depending which side of the country you are on). Few people actually TRY to make mayonnaise, because it has the reputation of being difficult to make.  Mayonnaise is a popular sauce for pairing with a wide variety of foods, was used in many ways, and had abundant variations. Much of this variety has been lost because of the ease of opening a jar. We have become so imprinted on the Hellman/Best Foods standard flavor that we overlook the delight to be found in fresh, homemade mayo.

I suspect that the commercial mayonnaise makers were responsible for the unreasonable claims that it is finicky and difficult to make. There are still pervasive myths. Among the most outlandish: Mayonnaise cannot be made by a menstruating woman. (It will fail to emulsify.) Also, mayonnaise cannot be made on a warm summer’s day, during a thunderstorm or a rainstorm, or when the barometer is showing a winter storm approaching. Some recipes insist that all the ingredients must be very cold, whereas others caution that they should be at room temperature. The mystique that surrounds creating the emulsion known as mayonnaise is certainly interesting. It makes you wonder: If it is so difficult to make, how is it that factories are able to consistently churn out truckloads of mayonnaise every day. (Do they ban menstruating women? Shut down during thunderstorms and fluctuating barometric pressure?)

The truth is: Mayonnaise is not difficult to make. If the idea was mastered in the 1500s, without refrigeration, by cooks during war campaigns — mayonnaise just cannot be that difficult.

The thing about making mayonnaise is that it, like most other cooking, is anything but an exact science. The most important ingredient (aside from good eggs and bland oil) is patience. A homemade product will, predictably, not turn out exactly the same every time. That is the nature of homemade, and the variations are part of the charm. The thing to remember about homemade mayonnaise is that it has a quality that cannot be mass-produced. It is an affordable luxury.

The science behind it is simple. Mayonnaise is an emulsion, which is a mix of two immiscible ingredients. Immiscible means incapable of mixing without a third substance called an emulsifier. In the case of mayonnaise, it is oil with a few drops of lemon juice or vinegar, which is mixed SLOWLY into egg yolks’ (lecithin in the eggs acts as an emulsifier).  A pinch of mustard powder or squeeze of prepared mustard (called for in most recipes) is an additional emulsifier.  The acid (lemon juice or vinegar) strengthens and lengthens the yolk’s proteins.


It is egg, and oil, with a little acid added (any kind of vinegar, lemon, or lime), plus a dash of salt. Mustard does help the emulsion hold together, so it is a good addition. Everything else is a suggestion. Keep this in mind when you read the following recipes. You can experiment with different kinds of mustards (grain, brown, dry powdered, prepared yellow) for different flavors. You can use different oils or oil mixtures. You can add various spices or other ingredients. The worst thing is to try to duplicate Hellman’s/Best Foods in flavor, texture, and color. It is nearly (if not completely) impossible to obtain the white color of commercially made mayonnaise. Yours will always be a richer, more interesting yellow. The flavor will be broader and the texture richer and creamier. The final product will often be thick. Add a tablespoon or more of cold water (or cream) to thin it.

The natural variation of homemade mayonnaise is due to the ingredients, the temperament of the cook, and the eggs. Eggs are not just eggs. They vary in seasonal quality—a spring egg is “wetter” than a late summer egg. A stored egg or an older refrigerated egg is thicker and dryer than a newly laid egg. An egg from a chicken fed on natural grasses is vastly different from an egg from a chicken raised on commercial pellets. A pastured chicken egg is different from a battery cage chicken egg. A freshly laid egg is different to work with than a commercial store-bought egg. Eggs from different strains of chickens probably have some minute differences, and eggs from different species have some very different characteristics. (A duck egg yolk and white are thicker than those of a chicken egg. A goose egg yolk is creamier than either a duck’s or a chicken’s.)

A freshly laid chicken egg is the easiest to work with for mayonnaise. But, unless you have chickens, this won’t be an option. Duck eggs make a very thick and rich mayonnaise, although you might need to add milk, cream, or water to thin it. Goose eggs make delicious mayonnaise, although some people find that it is too intensely egg-flavored.

A little about oil: Olive oil is the standard go-to for mayonnaise, but many olive oils are too flavorful and any undesirable traits, such as bitterness or an overbearing acid flavor, will be accentuated in the mayonnaise. In most cases, this detracts from or clashes with the flavors in the meal. It is better to find a neutral olive oil (such as a Spanish one) or use another type of bland, neutral oil such as safflower or sunflower oil. You can even try melted unsalted butter, it makes a very interesting mayonnaise, which is quite rich, and very unique.

(What causes me the most challenges is one of my own human foibles: impatience. Do not attempt to make mayonnaise if you are in a hurry. Mayonnaise cannot be rushed.)

Making an emulsion takes patience! By its very nature, an emulsion is something that does not want to blend. You have to coax the egg into accepting the oil and dribble the oil in slowly. I use an eyedropper and try not to add more than a few drops at a time. (I have never tried “pour in a thin stream” without awful results). I dribble the oil, drop by drop, at the start, and then move up to teaspoonfuls. I also give the yolk ample time to “rest.”  Stopping for a moment is handy. Stop and take a breath. This tip is good to remember if you begin to see the emulsification stalling and the mayonnaise just beginning to “break” (forming big, ugly curds that will not go back together again). You can settle the mixture down by pausing, adding a few drops of cold water, and just waiting a moment before continuing.

If you want a good workout, use a wire whisk and a large bowl that will allow the yolk to spread out into a very thin layer. It will give you a clear view of what is going on, and if any breaking starts, you can stop it quickly. (A deep, narrow bowl does not afford as much control.)

I’ve read that you can use a hand whisk, a rotary hand mixer, an electric hand mixer, a stick blender, an upright blender, or a food processor. However, I have used only a whisk or an electric hand mixer. It took me about three tries (one afternoon) before I managed to find a technique that worked for me. I have tried since then to use a blender and a food processor but always return to what I find easiest: the hand mixer and a big bowl with a flat bottom. But there is no one right way. Experiment, and find what works for you.

Expect a few mishaps before you get your technique down. The most common error, from my experience, is rushing it and adding the oil too fast. The point is to keep the egg yolk (or yolks) in motion while you add the oil, a drop at a time.

Basic Simple Mayo Recipe:

Mayonnaise

3 egg yolks
1 tablespoon wine vinegar or lemon juice
½ teaspoon salt
¼ teaspoon prepared mustard
1½ cups olive oil, salad oil, or mixture

2 tablespoons boiling water

Beat egg yolks with salt, mustard, and vinegar or lemon juice. Add oil, a drop at a time, and keep beating. Dribble oil in, in short bursts, beating constantly to make sure egg mixture absorbs oil smoothly. Dribble, and then stop and beat. Dribble, stop, and beat. When 1/3 cup oil is mixed in, the chance of the whole sauce’s breaking is lessened, so you can add oil in larger amounts (such as a teaspoon at a time). Continue until all oil has been used. The end result will be very thick and creamy. Thin with a little boiling water or a mixture of hot water and more vinegar or lemon juice if mixture is too thick. Add seasoning after mayonnaise has been chilled, covered, for an hour. (If not covered, it may develop an unsightly “skin” on top.)

If you are at all fearful of the dreaded “salmonella” (which I will cover on a different post, and best avoided by buying the freshest eggs, from the most natural source you can find — like a farmer’s market with the actual chicken wrangler right there selling them, or, naturally, from chickens wandering your backyard) then here is a “cooked” mayo recipe:

Cooked Mayo

2 egg yolks

2 tablespoons lemon juice

2 tablespoons water

1 teaspoon dry mustard

dash pepper

1 cup very light olive oil

In double boiler, over simmering water, stir egg yolks, lemon juice, water, mustard, and pepper until blended. Continue stirring constantly. Using a glass cooking thermometer, get temperature to 140 degrees and maintain that temperature for 3½ minutes. Remove from heat (take pan off hot water), and let sit for several minutes to cool. Pour into blender, cover, and blend at high speed. Add oil, drop by drop, slowly. Keep adding more oil while blender is going, until all oil is absorbed. Yolk will become very thick and smooth. Occasionally turn off blender to scrape down sides with rubber spatula. Remove mayonnaise from blender, and placed in covered container. Keep refrigerated.

.